Leave Request Workflow
From Subscribe-HR Wiki Help
Leave Request Workflows Explained
A Leave Request workflow will enable a powerful feature in Subscribe-HR.
When an Employee submits a Leave Request the relevant person (presumably a manager of the Employee) is notified via a workflow email and the request will appear in the person(s) My Team's Tasks & Reminders panel on the Dashboard. Managers can then approve the Leave Request, and the Employee can see this approval and cancel this request at anytime before the event occurs.
Creating a Leave Request Workflow
- After logging into the Subscribe-HR portal, select the Development TAB.
- Select the Objects folder.
- Search for and Select Employee Absence Details.
- Select the Workflow Tasks sub-folder.
- Select the create button.
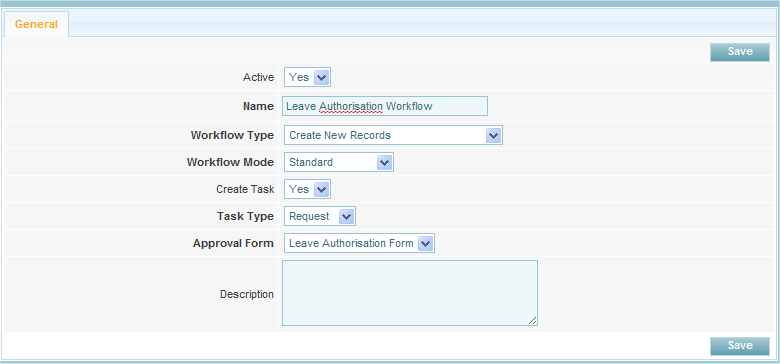
- Change Active to No for now. This will ensure that workflows are not executed while we are setting up the workflow.
- Enter Leave Authorisation into the Name field.
- Select the Workflow Type as Create New Records.
- Select the Workflow Mode as Standard.
- Select Yes in the Create Task drop down.
- Select the Task Type as Request.
- Select Leave Authorisation Form from the Approval Form drop down.
- Enter a Description about the workflow.
- Select the Save Button.

- After Save, select the Condition TAB.
- Select Absence Status (Absence) from the Add condition drop down.
- Select Equals To.
- Select Request.
- Select the Save button.